2011年1月6日木曜日

groovyとgooglechartwrapperで棒グラフの基準線を設定する

groovyとgooglechartwrapperで棒グラフの基準線を設定するには、以下のコードを実行します。

import java.awt.*
import java.net.*
import javax.imageio.*
import de.toolforge.googlechartwrapper.*
import de.toolforge.googlechartwrapper.data.*
import de.toolforge.googlechartwrapper.label.*
import de.toolforge.googlechartwrapper.util.*
import de.toolforge.googlechartwrapper.style.*
import de.toolforge.googlechartwrapper.coder.*
import de.toolforge.googlechartwrapper.color.*

// 棒グラフ
bc = new BarChart(
new Dimension(250, 250),
BarChart.BarChartOrientation.Horizontal,
BarChart.BarChartStyle.Grouped)
bc.setEncoder(EncoderFactory.getEncoder(
EncodingType.TextEncoding))

// グラフに基準線を設定する
bc.setBarChartZeroLine(new BarChartZeroLine(0.5f))

// 値は0から100
data = new BarChartDataSerie.BarChartDataSerieBuilder(
[85, 75, 40, 15, 70]).build()
bc.addBarChartDataSerie(data)

// X軸
xa = new AxisLabelContainer(AxisType.XAxis)
xa.setAxisRange(new AxisRange(0, 5, 1))
bc.addAxisLabelContainer(xa)

// Y軸
ya = new AxisLabelContainer(AxisType.YAxis)
ya.setAxisRange(new AxisRange(-50, 50))
bc.addAxisLabelContainer(ya)

bc.setBarWidthAndSpacing(
BarWidthAndSpacing.newAutomaticallyResize())

// URLを取得
println bc.getUrl()
// 画像として保存
bi = MiscUtils.getBufferedImage(bc)
ImageIO.write(bi, "png", new File ("barchart16.png"))


実行画面


※以下のjarを$GROOVY_HOME/libにコピー
googlechartwrapper_1.1.jar

動作環境
groovy 1.7.5, JDK6 Update22, googlechartwrapper 1.1

関連情報
googlechartwrapperのwebサイト
http://code.google.com/p/googlechartwrapper/

2011年1月5日水曜日

groovyとApache ClickでTextFieldの必須項目指定する

groovyとApache ClickでTextFieldの必須項目指定するには、以下のコードを実行します。

1.ページクラス
TextFieldTest2.groovy
package com.blogspot.groovyarekore.click

import org.apache.click.*
import org.apache.click.control.*

class TextFieldTest2 extends Page
{
def form = new Form("form")

public TextFieldTest2()
{
// コンストラクタでの必須項目指定
form.add(new TextField("field1", "フィールド1", true))

def textfield2 = new TextField("field2", "フィールド2")
// setRequiredメソッドでの必須項目指定
textfield2.setRequired(true)
form.add(textfield2)

form.add(new Submit("ok", "OK", this, "onOkClick"))
addControl(form)
}
def onOkClick()
{
if( form.isValid() ){
addModel("msg1", "${form.getFieldValue("field1")}")
addModel("msg2", "${form.getFieldValue("field2")}")
}
return true
}
}

2.HTMLページ
text-field-test2.htm
<html>
<head><title>text field test2</title></head>
$headElements
<body>
#if ($msg1)
$msg1<br />
$msg2
#else
$form<br />
#end
$jsElements
</body>
</html>

ブラウザから以下のURLにアクセスします。
http://localhost:8080/(warの名前)/text-field-test2.htm

出力画面


動作環境
JDK6 Update22, Groovy 1.7.5, Apache Click 2.2.0, Apache Tomcat 7.0.4

関連情報
ビルドの仕方などは「groovyとApache ClickでHello Worldを作成する 」を参照
※click-extras-2.2.0.jarもクラスパスに入れる
http://groovyarekore.blogspot.com/2010/11/groovyapache-clickhello-world.html

2011年1月4日火曜日

groovyとSpiderDBでDBのドライバー名とドライバーバージョンを表示する

groovyとSpiderDBでDBのドライバー名とドライバーバージョンを表示するには、以下のコードを実行します。

import groovy.sql.Sql
import com.avdheshyadav.spiderdb.*

sql = Sql.newInstance(
"jdbc:postgresql://localhost:5432/liferay",
"postgres",
"postgres",
"org.postgresql.Driver")

dbc = new DBCrawler(sql.getConnection(), ConfigEnum.MAXIMUM)
db = dbc.getDatabase()

println "ドライバー名:${db.getDriverName()}"
println "ドライバーバージョン:${db.getDriverVersion()}"


※以下のjarをGROOVY_HOME/libにコピーしておく
commons-lang-2.5.jar
spiderdb-1.7.jar

動作環境
JDK6 Update22, groovy 1.7.5, SpiderDB 1.7

関連情報
SpiderDBのプロジェクトページ
http://code.google.com/p/spiderdb/

groovyとgooglechartwrapperで棒グラフのスケールを設定する

groovyとgooglechartwrapperで棒グラフのスケールを設定するには、以下のコードを実行します。

import java.awt.*
import java.net.*
import javax.imageio.*
import de.toolforge.googlechartwrapper.*
import de.toolforge.googlechartwrapper.data.*
import de.toolforge.googlechartwrapper.label.*
import de.toolforge.googlechartwrapper.util.*
import de.toolforge.googlechartwrapper.style.*
import de.toolforge.googlechartwrapper.coder.*
import de.toolforge.googlechartwrapper.color.*

// 棒グラフ
bc = new BarChart(
new Dimension(250, 250),
BarChart.BarChartOrientation.Horizontal,
BarChart.BarChartStyle.Grouped)
bc.setEncoder(EncoderFactory.getEncoder(
EncodingType.TextEncoding))

// グラフにスケールを設定する
bc.addDataScalingSet(
new DataScalingSet(0d, /*= minimumValue*/
200d /*= maximumValue*/)
)

// 値は0-200
data = new BarChartDataSerie.BarChartDataSerieBuilder(
[35, 52, 128, 160, 190]).build()
bc.addBarChartDataSerie(data)

// X軸
xa = new AxisLabelContainer(AxisType.XAxis)
xa.setAxisRange(new AxisRange(0, 5, 1))
bc.addAxisLabelContainer(xa)

// Y軸
ya = new AxisLabelContainer(AxisType.YAxis)
ya.setAxisRange(new AxisRange(0, 200))
bc.addAxisLabelContainer(ya)

bc.setBarWidthAndSpacing(
BarWidthAndSpacing.newAutomaticallyResize())

// URLを取得
println bc.getUrl()
// 画像として保存
bi = MiscUtils.getBufferedImage(bc)
ImageIO.write(bi, "png", new File ("barchart15.png"))


実行画面


※以下のjarを$GROOVY_HOME/libにコピー
googlechartwrapper_1.1.jar

動作環境
groovy 1.7.5, JDK6 Update22, googlechartwrapper 1.1

関連情報
googlechartwrapperのwebサイト
http://code.google.com/p/googlechartwrapper/

2011年1月3日月曜日

groovyとApache ClickでTextFieldのサイズを指定する

groovyとApache ClickでTextFieldのサイズを指定するには、以下のコードを実行します。

1.ページクラス
TextFieldTest.groovy
package com.blogspot.groovyarekore.click

import org.apache.click.*
import org.apache.click.control.*

class TextFieldTest extends Page
{
def form = new Form("form")

public TextFieldTest()
{
// コンストラクタでのサイズ指定
form.add(new TextField("field1", "フィールド1", 20))

def textfield2 = new TextField("field2", "フィールド2")
// setSizeメソッドでのサイズ指定
textfield2.setSize(15)
form.add(textfield2)

form.add(new Submit("ok", "OK", this, "onOkClick"))
addControl(form)
}
def onOkClick()
{
addModel("msg1", "${form.getFieldValue("field1")}")
addModel("msg2", "${form.getFieldValue("field2")}")
return true
}
}

2.HTMLページ
text-field-test.htm
<html>
<head><title>text field test</title></head>
$headElements
<body>
#if ($msg1)
$msg1<br />
$msg2
#else
$form<br />
#end
$jsElements
</body>
</html>

ブラウザから以下のURLにアクセスします。
http://localhost:8080/(warの名前)/text-field-test.htm

出力画面


動作環境
JDK6 Update22, Groovy 1.7.5, Apache Click 2.2.0, Apache Tomcat 7.0.4

関連情報
ビルドの仕方などは「groovyとApache ClickでHello Worldを作成する 」を参照
※click-extras-2.2.0.jarもクラスパスに入れる
http://groovyarekore.blogspot.com/2010/11/groovyapache-clickhello-world.html

2011年1月2日日曜日

groovyとgooglechartwrapperでグリッド付の棒グラフを描画する

groovyとgooglechartwrapperでグリッド付の棒グラフを描画するには、以下のコードを実行します。

import java.awt.*
import java.net.*
import javax.imageio.*
import de.toolforge.googlechartwrapper.*
import de.toolforge.googlechartwrapper.data.*
import de.toolforge.googlechartwrapper.label.*
import de.toolforge.googlechartwrapper.util.*
import de.toolforge.googlechartwrapper.style.*
import de.toolforge.googlechartwrapper.coder.*
import de.toolforge.googlechartwrapper.color.*

// 棒グラフ
bc = new BarChart(
new Dimension(250, 250),
BarChart.BarChartOrientation.Horizontal,
BarChart.BarChartStyle.Grouped)
bc.setEncoder(EncoderFactory.getEncoder(
EncodingType.TextEncoding))

// グラフにグリッドを設定する
bc.setGridLine(new GridLine.GridLineBuilder(10f, 10f).build())

// 値は0-100
data = new BarChartDataSerie.BarChartDataSerieBuilder(
[35, 52, 88, 75, 90]).build()
bc.addBarChartDataSerie(data)

// X軸
xa = new AxisLabelContainer(AxisType.XAxis)
xa.setAxisRange(new AxisRange(0, 5, 1))
bc.addAxisLabelContainer(xa)

// Y軸
ya = new AxisLabelContainer(AxisType.YAxis)
ya.setAxisRange(new AxisRange(0, 100))
bc.addAxisLabelContainer(ya)

bc.setBarWidthAndSpacing(
BarWidthAndSpacing.newAutomaticallyResize())

// URLを取得
println bc.getUrl()
// 画像として保存
bi = MiscUtils.getBufferedImage(bc)
ImageIO.write(bi, "png", new File ("barchart14.png"))


実行画面


※以下のjarを$GROOVY_HOME/libにコピー
googlechartwrapper_1.1.jar

動作環境
groovy 1.7.5, JDK6 Update22, googlechartwrapper 1.1

関連情報
googlechartwrapperのwebサイト
http://code.google.com/p/googlechartwrapper/

2011年1月1日土曜日

groovyとApache ClickでActionLinkの下線を消す

groovyとApache ClickでActionLinkの下線を消すには、以下のコードを実行します。

1.ページクラス
ActionLinkTest2.groovy
package com.blogspot.groovyarekore.click

import org.apache.click.*
import org.apache.click.control.*

class ActionLinkTest2 extends Page
{
def link = new ActionLink("link", "テスト")
public ActionLinkTest2()
{
link.setListener(this, "onLinkClick")
// リンクの下線を消す
link.setStyle("text-decoration", "none")
addControl(link)
}
def onLinkClick()
{
addModel("msg", "clicked..")
return true
}
}

2.HTMLページ
action-link-test2.htm
<html>
<head><title>action link test2</title></head>
<body>
#if ($msg)
$msg
#else
please click the link below.<br />
$link<br />
#end
</body>
</html>

ブラウザから以下のURLにアクセスします。
http://localhost:8080/(warの名前)/action-button-test2.htm

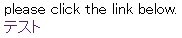
実行画面


動作環境
JDK6 Update22, Groovy 1.7.5, Apache Click 2.2.0, Apache Tomcat 7.0.4

関連情報
ビルドの仕方などは「groovyとApache ClickでHello Worldを作成する 」を参照
※click-extras-2.2.0.jarもクラスパスに入れる
http://groovyarekore.blogspot.com/2010/11/groovyapache-clickhello-world.html